How to dub a movie all by yourself using VideoPlus Studio
Movie dubbing is not a simple task, it usually requires a team of professionals for translation, voiceover recording, sound mixing and editing, etc. VideoPlus Studio can detect the speaking language of the audio in a video, transcribe the audio to text and save it to a subtitle file. Along with a translation utility and a flexible subtitle editor that can define a presenter for every line of the subtitles, you can dub a movie all by yourself - the process closely resembles how it's done professionally, but without the hassle of using real voice actors, recording, etc.
Learn how to dub the fictive 'Back To The Future 4' movie trailer in English to French in this step-by-step tutorial.
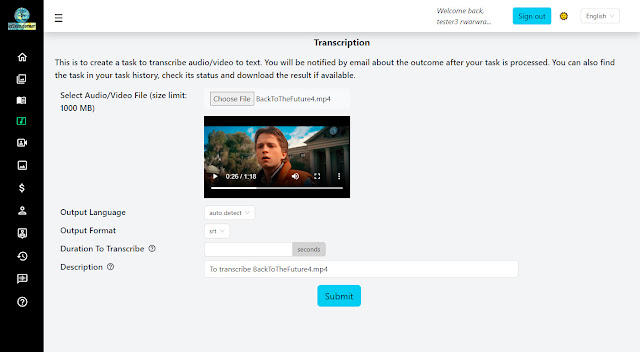
1. First get the video transcription. Click the 'Transcription' button in the menu, select your video and submit the task.
2. Find the finished task and download the resulting subtitle file when available.
3. Click 'TTS for Video' in the menu then open the video file and import the subtitle file using the function buttons in the top toolbar.
4. Go over the video, identify the voices to dub, delete subtitles not corresponding to human speech and the ones not to be dubbed, check if the text of remaining subtitles is all right, make changes as needed.
5. Now translate the subtitles. Click the translate function button in the top toolbar, select French as the target language and confirm.
6. When the translation is done, check if the translated text is all right and make changes as needed.
7. Click 'Presenter' in the menu, go through your presenters and decide which one to use for each actor.
8. If you need to create a new presenter or update an existing one, select the right gender and language, listen to the audio samples and choose one that sounds closest to the original voice. If none of the predefined voices is suitable for a presenter, try to find a piece of audio on the web that reflects the voice well, then save the file for the presenter using the 'Clone Voice' option. The voice can also be fine-tuned by adjusting audio properties (pitch, speed and volume).
9. Now select the proper presenter for each subtitle. The subtitle duration will be automatically adjusted when selecting a presenter, based on the average speaking speed of the voice defined for the presenter. This can create overlaps as the duration of the translated text is different from the original one. Adjust the start and end time for each subtitle until there are no overlaps (showing as red blocks).
10. Go over the whole video until you're happy with how the subtitles show, then use the export function button in the top toolbar to save the subtitles to a local file in json format, so that it's easy to make adjustments later if needed.
11. Click 'Submit Task' button in the top toolbar, check the 'Keep Existing Audio' and 'Suppress Underlying Audio' options.
12. Check 'Burn Subtitles' if needed, and change the Output Length, to ten seconds for example, to generate a short video as a preview before generating the full length video.
13. Submit and wait till the task is done (notified by email), or check its status in the task history, check back if not ready.
14. Find the task and download the resulting video when available, see if you should adjust some text, presenter, etc., if yes, submit the task again after making changes, repeat the process until getting the desired result.


Comments
Post a Comment